Your first UWP app with C#
Published on 2018-04-12
People use desktop applications every single day to watch videos, sort through their photos, or create and process documents. In this blog post, we'll discuss how you can start creating desktop applications for Microsoft Windows 10 with the UWP platform. To read more technical details about UWP, you can visit the previous blog post on that topic available here. The post also contains information on how to setup Visual Studio Community (a free IDE by Microsoft), which is needed to create desktop applications with UWP. Unless you can install the IDE by yourself (which is, honestly, not that hard), I recommend you visit that blog post before coming back here.
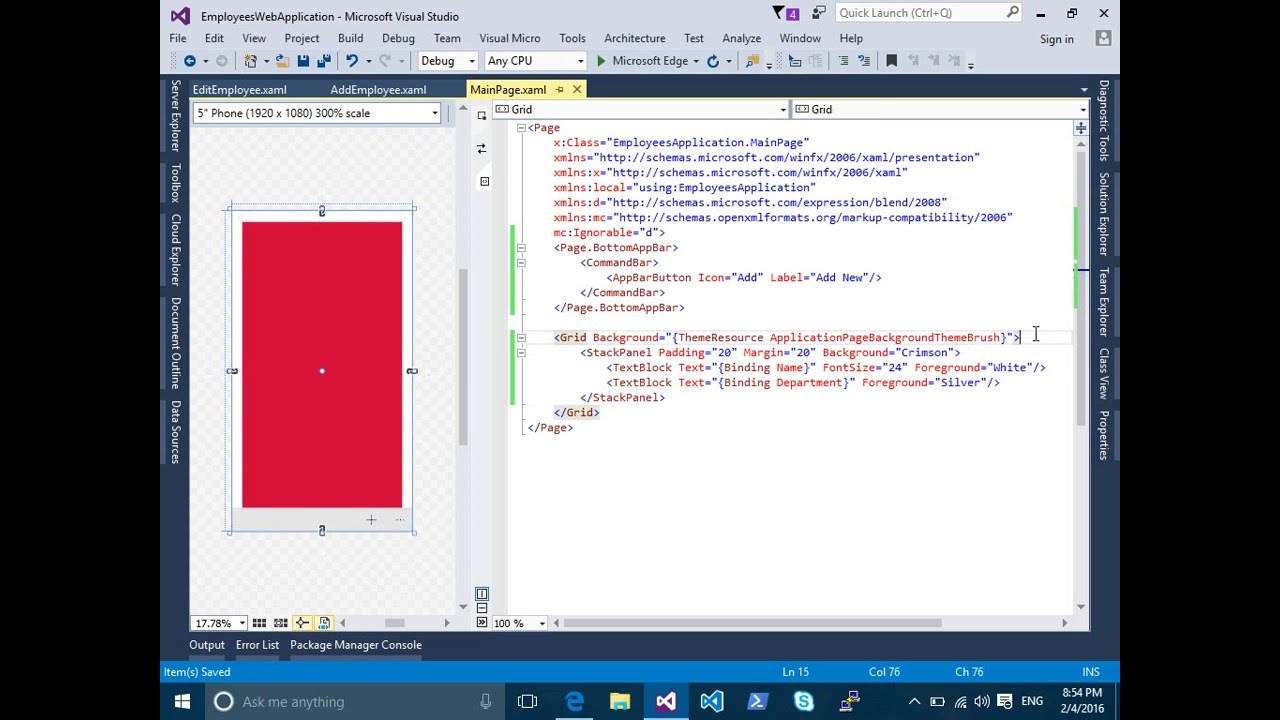
After you have the IDE setup, you can start creating UWP applications with the awesome Visual Studio IDE, which you can see above. It features great tools for debugging, designing an interface, coding with auto-completion and syntax highlighting and more. So, let's get started.
Creating a project
Before we boot up Visual Studio, let's make sure we understand what project we're going to work on. In this tutorial, we are going to create a simple desktop application that will convert input strings (i.e. text like "abc") to MD5 (i.e. we want an application that will hash input strings, like it's done with passwords). The idea is quite simple, but the demo application is going to show us how to create UI elements, respond to events (a change in the input text box), and how to update UI controls through programming code.
Now that we have a plan, it's time to get our hands dirty. Find the Visual Studio icon (on your Desktop, or in the list of available programs) and start it up. Next, from the top menu select New, and then Project. Make sure that you have "Visual C#" and "Windows Universal" selected on the left, and in the center select "Blank App (Universal Windows)", as shown in the image below. Make sure you provide a name for your app - I've used "DemoMD5" below.
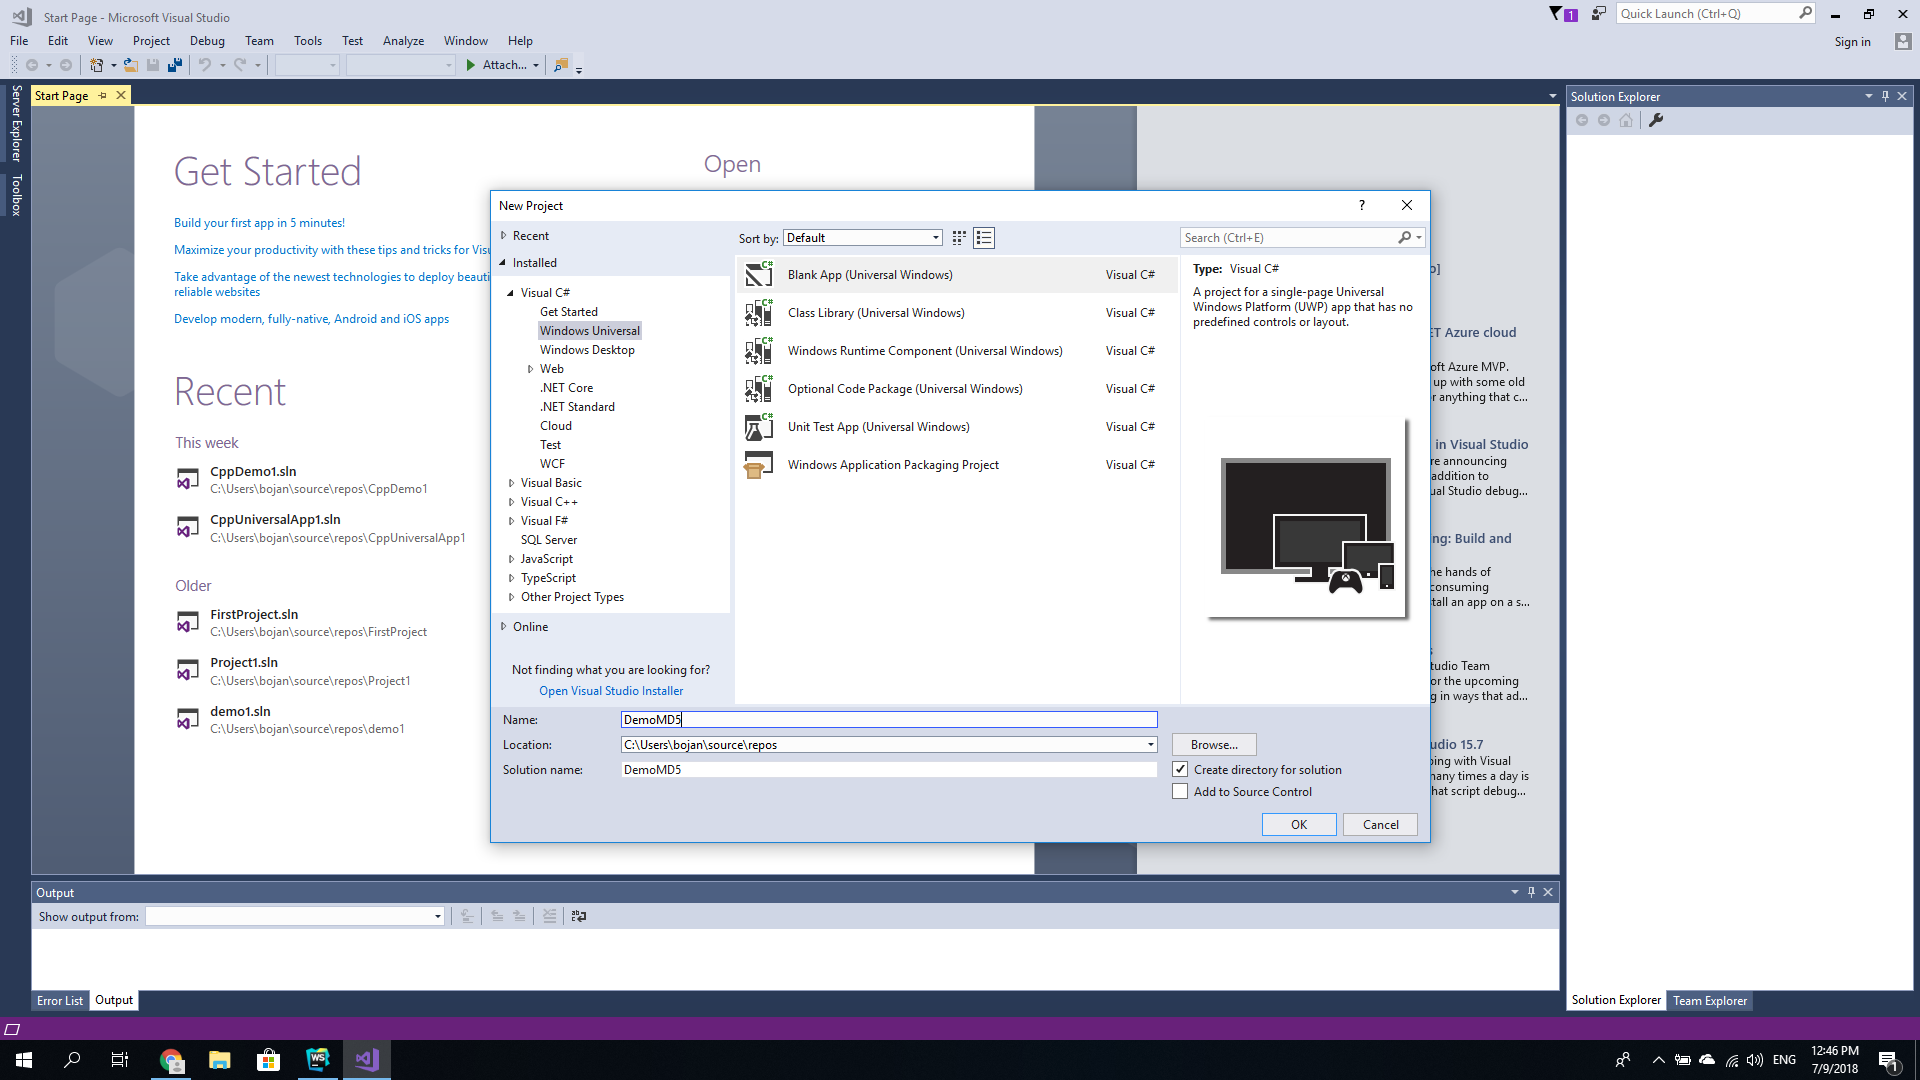
On the next screen, you will be asked to choose which operating systems you want your app to run on. Just go with the default options here and click "OK". After a while, Visual Studio will create all the necessary files and folders and have your project ready.
(At this point, you may want to run the current version of the application from the top menu: Debug, and then "Start without debugging"; or through the green Run icon. If you do decide to do that, you should see a blank application with no elements inside it. Any possible problems (which shouldn't exist at this point) will be listed on the bottom of the screen)
Setup the UI
On the right side of the screen (of Visual Studio), you can see a list of project files. Open the file named "MainPage.xaml" by double clicking on it. Here, we can see how our application looks like (you can even select a device on the top-left side), and we can also see the source code (the contents of the .xaml file) on the bottom. At this point, however, we're going to use the designer view and drag&drop elements there.
You can see the available UI elements by clicking on the Toolbox tab (the link is visible on the far-left side of the screen). A list of elements will show up (if you can't see them, click on "Common XAML Controls"). Now, drag a "StackPanel" control to the screen - i.e. from the list of controls on the left to the design view of the app (A StackPanel is a control that helps us arrange child elements into a single line - oriented horizontally or vertically. Without a StackPanel, it's much harder to center and arrange your elements properly.).
Feel free to change the width and height of the StackPanel, and to center it horizontally (Visual Studio is actually very helpful here by indicating when the element is correctly placed in the center). After you are done with resizing and centering the StackPanel, drag three more elements inside of it: TextBlock, TextBox and TextBlock.
The first TextBlock will show a message to the user indicating that they should write some text inside the TextBox. The second TextBlock will be placed on the bottom, and the contents of the TextBlock will be the MD5 hash value of the input string. We're going to change that value dynamically.
After you drag and drop the elements inside the StackPanel, you may notice that they are a bit small (this depends on the device you have selected for the preview). If you select any of the controls, you can see and modify their properties on the right side of the screen. Now, go and increase the font size of all three elements (to whatever value you want, for example 36px). You can also modify the size of the controls. If you're stuck with anything at this point, please take a look at the image below.
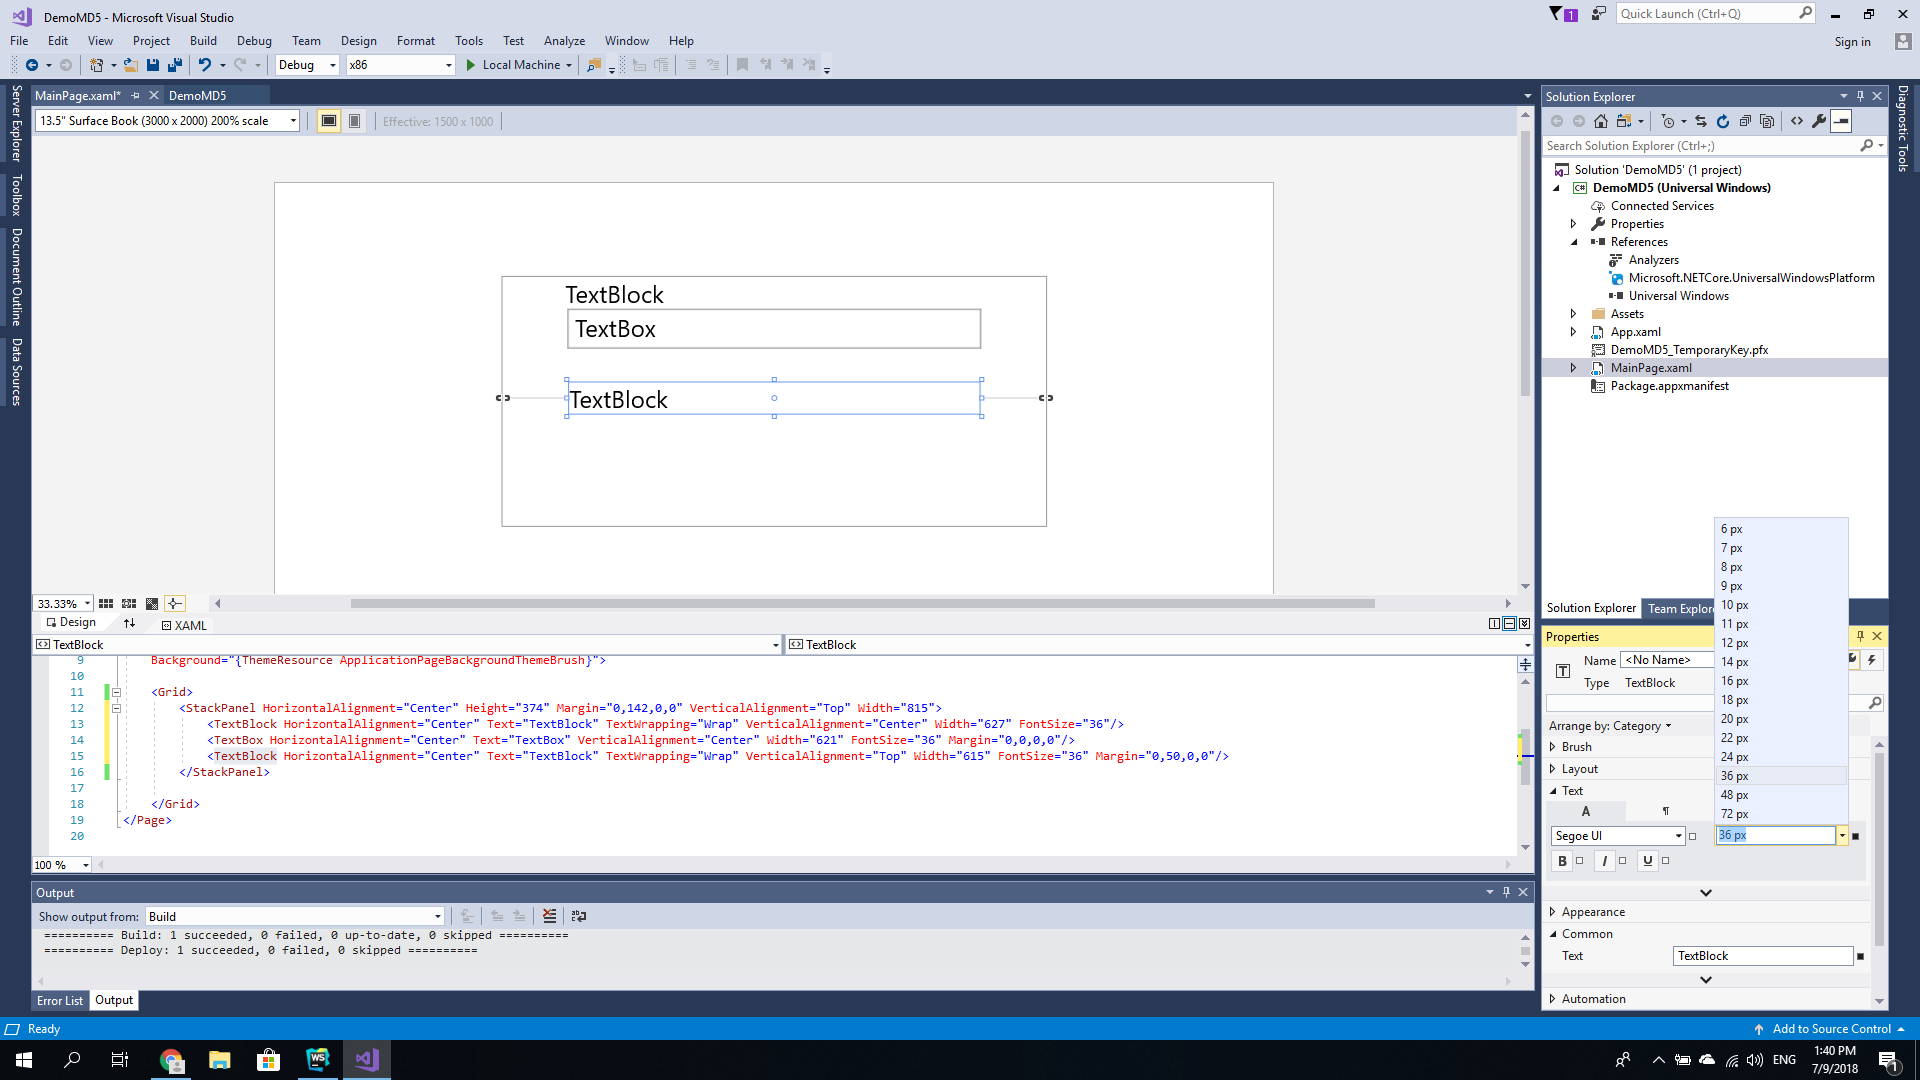
From the same Properties window, you can change the text (contents) of the controls. Go and change the initial text of the first TextBlock to "Input string:", the initial contents of the TextBox to "The input..." and the contents of the final TextBlock to "...". Cool, we're done with the initial part of the design. If you are stuck with anything, please make sure your MainPage.xaml contents looks something like this (note it doesn't have to be exactly the same!).
<Page
    x:Class="DemoMD5.MainPage"
    xmlns="http://schemas.microsoft.com/winfx/2006/xaml/presentation"
    xmlns:x="http://schemas.microsoft.com/winfx/2006/xaml"
    xmlns:local="using:DemoMD5"
    xmlns:d="http://schemas.microsoft.com/expression/blend/2008"
    xmlns:mc="http://schemas.openxmlformats.org/markup-compatibility/2006"
    mc:Ignorable="d"
    Background="{ThemeResource ApplicationPageBackgroundThemeBrush}">

    <Grid>
        <StackPanel HorizontalAlignment="Center" Height="374" Margin="0,142,0,0" VerticalAlignment="Top" Width="815">
            <TextBlock HorizontalAlignment="Center" Text="Input string:" TextWrapping="Wrap" VerticalAlignment="Center" Width="627" FontSize="36"/>
            <TextBox HorizontalAlignment="Center" Text="The input..." VerticalAlignment="Top" Width="624" FontSize="36" Margin="0,15,0,0"/>
            <TextBlock HorizontalAlignment="Center" Text="..." TextWrapping="Wrap" VerticalAlignment="Top" Width="615" FontSize="24" Margin="0,50,0,0"/>
        </StackPanel>

    </Grid>
</Page>
Please notice how all three text elements are inside the StackPanel element.
A bit of coding
Okay, so we have a TextBox that the user can edit. But, how can we calculate the MD5 hash of that input string and present it to the user? It turns out that we should do just two things: create a name for the final TextBlock (so we can reference it from the source code), and then handle the change event of the TextBox.
In order to create a name for the final TextBlock, open the MainPage.xaml file (the one we were working on until now), and add a property called "x:Name" to the line where the final TextBlock is implemented. The start of the line should look something like this: <TextBlock x:Name="md5Block". (Please note I've named the block "md5Block").
After you do that, just double click on the TextBox (in the design view), and Visual Studio should automatically create a TextBox_TextChanged event and open a file where you can handle that event. In C#, we can calculate an MD5 hash through "System.Security.Cryptography.MD5". Finally, to update the value of the final TextBlock and present the hashed contents there, we can write md5Block.Text = "..." (md5Block is the name that we've chosen for the control - see above).
private void TextBox_TextChanged(object sender, TextChangedEventArgs e)
{
    string input = ((TextBox) sender).Text;

    using (System.Security.Cryptography.MD5 md5 = System.Security.Cryptography.MD5.Create())
    {
        byte[] inputBytes = System.Text.Encoding.ASCII.GetBytes(input);
        byte[] hashBytes = md5.ComputeHash(inputBytes);

        // Convert the array to a hexadecimal string
        System.Text.StringBuilder sb = new System.Text.StringBuilder();
        for (int i = 0; i < hashBytes.Length; i++)
        {
            sb.Append(hashBytes[i].ToString("X2"));
        }

        md5Block.Text = sb.ToString();
    }
}
Please note how we got the input string through the sender object (the sender of the TextChanged event is clearly the TextBox element, because that's the element that we double clicked on - i.e. the UI control we wanted to process the TextChanged event for). Pretty simple, huh? Of course, depending on the type of element, various events can be handled (for example, click events for buttons, etc).
Final changes
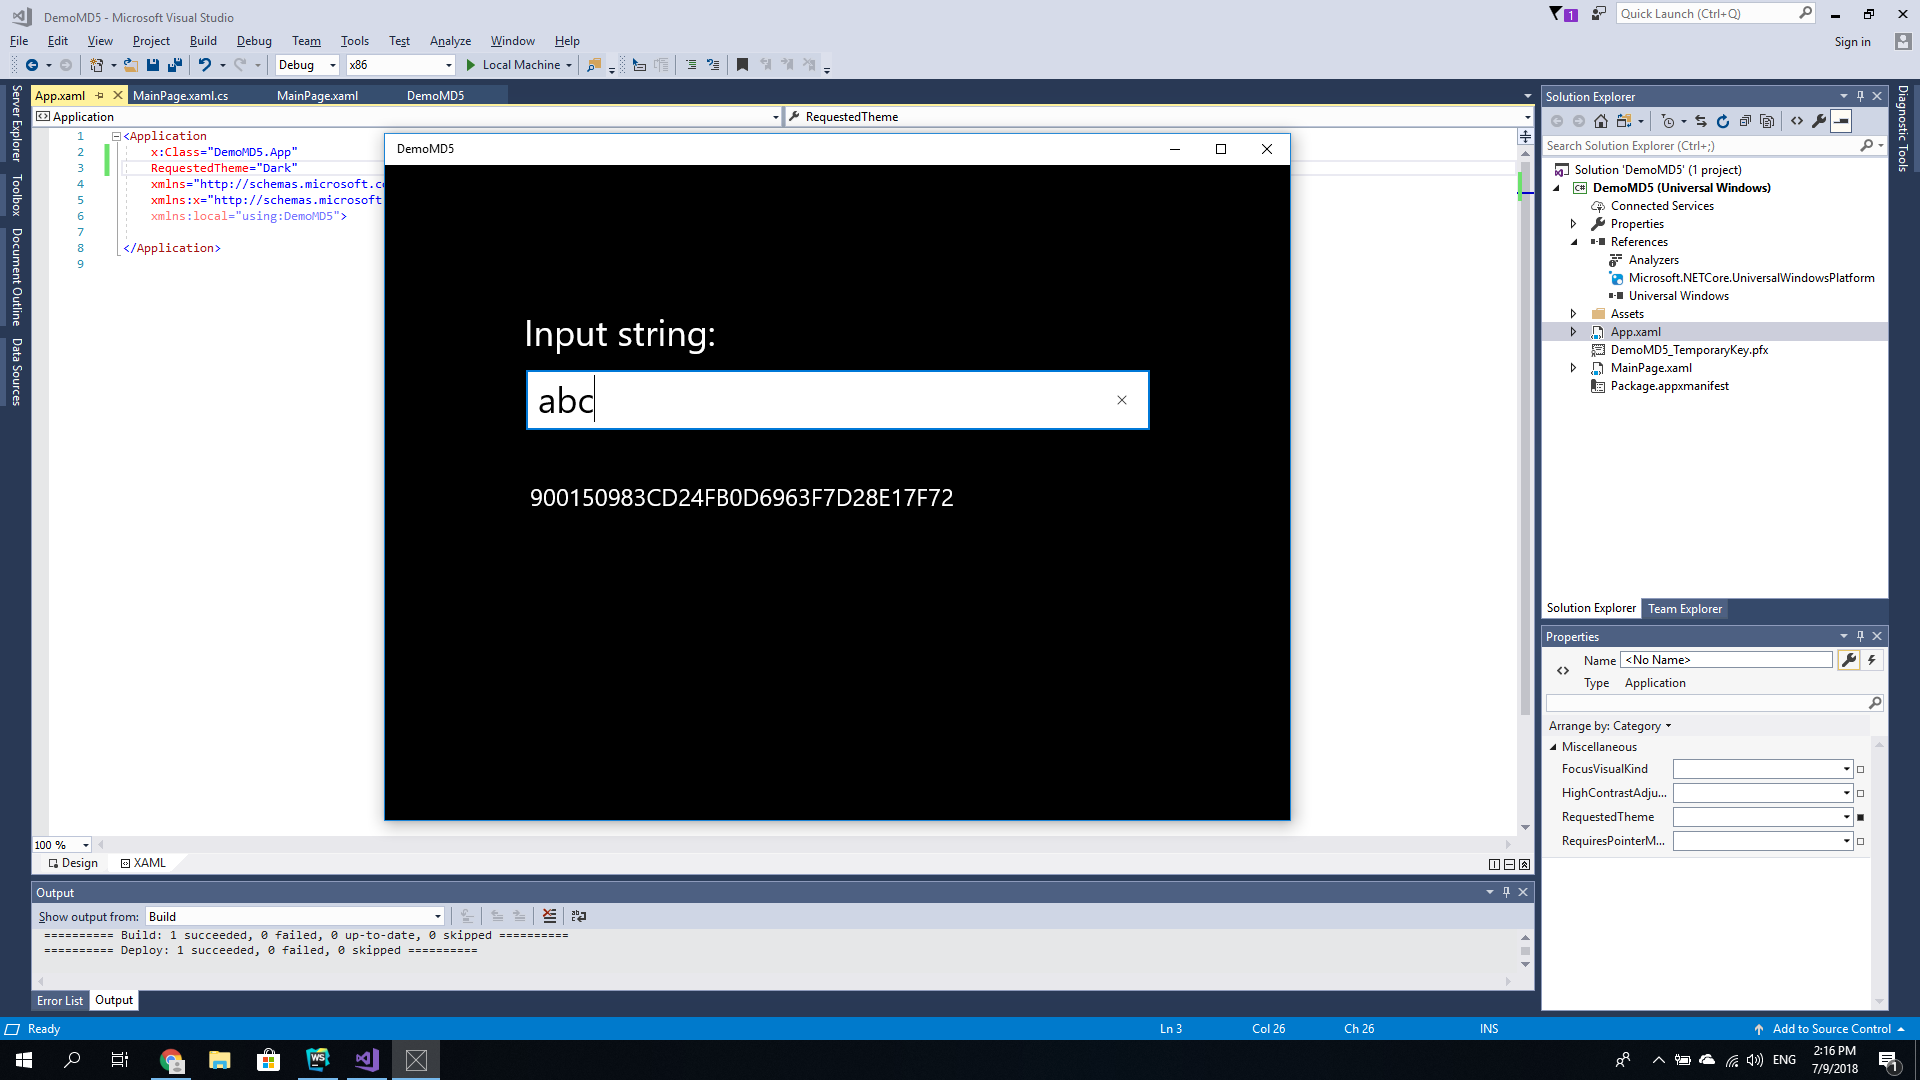
At this point, we have a working application. As a final trick, let's try and change the Theme of the application to "Dark", and see how easy that is. Open the file named App.xaml (the list of files can be seen on the right side of the screen), and add the property RequestedTheme="Dark" to the Application element (for example, after the line containing "x:Class"). Now, start the application through the top menu (Debug), or the green run button. The application should look as presented below.
Although the application we created contains only three UI controls and a StackPanel, it actually shows quite a few things - how to design an application, how to process events, how to update element contents and more. In the next couple of weeks, we're going to publish more tutorials and guides on how to develop desktop applications for Microsoft Windows. At this point, however, you should be able to start creating simple apps by yourself, or to read more about UWP and the great features offered by it. Good luck!